Hello fellow scrappers! Yes, I know--where have I been!? Well just one word. Packing! I'm the middle of buying & selling a home & for those of you out there that have done this, I'm sure you're quite aware as to how hectic, stressful & time consuming this entire process is. We're set to physically move in less than a week & packing/prepping has been taking up a gigantic amount of my time--in addtion to my full time job that eats up 8 hours of my day. I'm hoping that once I move & get the time to settle down I'll slowly get back into my old routine. I sure do miss it! I haven't been able to peacefully scrap in about 2 months now.
Today I finally decided to take a break & put up this post. For me this is a sanity check--am going back for just a few minutes to something that I love which is crafting. I decided to post this layout I made for both Authentique & Clear Scraps. I've also used several of Authentique's new stamps made by Hampton Art. Authentique has 3 of these sets which are co-branded by Hampton Art. All papers used were from Authentique's Seasons: Summer Collection.
This is my son during one of his 'tummy time' sessions. He's got these huge almond shaped eyes & this photo captured those big doe eyes at thier best. :-)

The script stamp as well as the stamped 'You Are My Sunshine' title are new stamps by Authentique/Hampton Art. The script stamp is from the 'Keep Me Posted' collection & the title is from the 'Footloose' collection.

The stamped sentiment is from the 'Grateful Heart' collection.

My cluster of embellies including my journaling which is stored in a scroll. This is officially a must for me now. I document all the stories behind my layouts & I found this to be the most convenient for me.

For this stamp I heat embossed it with black glittered embossing powder to give it a bit more dimension.

This acrylic frame is by Clear Scraps. It's the Small Oval Fancy Frame. To give it color I applied drops of alcohol inks directly from the bottle onto the acrylic frame. Then waited a few minutes for it to dry. Directly applying alcohol inks onto acrylic in this way produces much more bolder colors & design.

Another close up of the acrylic frame as well as my masking in the upper corners of my layout. The mask used is the 6" Swirl Mascil also by Clear Scraps.

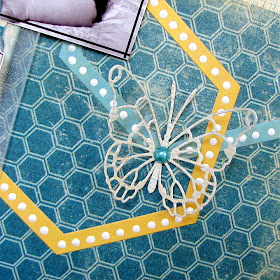
I added more dimension all along my page by placing dots of acrylic paint onto my honeycomb die cuts.
Thanks for stopping by & I hope to be back soon with more posts. I'll most likely be MIA for a bit longer while I move & actually settle down. In the meantime, enjoy the rest of the week!

